Color grading is a vital aspect of video production that transforms raw footage into visually
stunning content. Whether you’re creating videos for social media, YouTube, or a personal
project, learning to color grade can elevate the quality of your work. The good news? You don’t
need expensive software to get started. Many free video editors offer robust tools for color
grading. This guide will walk you through the basics of color grading using free video editor.
What Is Color Grading?
Color grading is the process of adjusting and enhancing the colors in a video to achieve a
specific look, mood, or style. Unlike color correction, which focuses on fixing issues like
exposure or white balance, color grading is about creatively enhancing the visuals to tell a story.
Why Is Color Grading Important?
Color grading can:
- Enhance storytelling by setting the tone and mood.
- Add a professional touch to your videos.
- Help maintain consistency across your footage.
Free Video Editors with Color Grading Features
Here are some popular free video editors that offer tools for color grading:
DaVinci Resolve (Free Version)
- One of the most powerful video editing tools, known for its advanced color grading features.
- Includes tools like color wheels, curves, and LUTs (Look-Up Tables).
HitFilm Express
- A beginner-friendly editor with essential color grading tools.
- Offers presets and customizable options for easy adjustments.
Lightworks Free
- Professional-grade editor with basic color grading capabilities in its free version.
Shotcut
- Open-source software with straightforward color grading tools like brightness, contrast, and
color balance adjustments.
VSDC Free Video Editor
Offers tools for color correction and grading, including LUTs and RGB curves.
Basic Concepts in Color Grading
Before diving into color grading, familiarize yourself with these key concepts:
White Balance
Adjust the temperature and tint of your video to ensure that whites appear neutral.
Exposure
Correct underexposed or overexposed footage by adjusting the brightness.
Contrast
Enhance the difference between light and dark areas for a more dynamic image.
Saturation
Control the intensity of colors to make your video more vibrant or subdued.
Color Wheels
Tools that allow you to adjust shadows, midtones, and highlights individually.
LUTs (Look-Up Tables)
Pre-made color grading presets that can be applied to footage for a specific look.
Step-by-Step Guide to Color Grading in Free Video Editors
Import Your Footage
Open your chosen video editor and import the footage you want to color grade. Place it on the
timeline to begin editing.
Adjust White Balance
Start by correcting the white balance to ensure accurate colors. Use the temperature slider to
make the video warmer (yellow) or cooler (blue). Adjust the tint if the footage has a green or
magenta cast.
Fix Exposure and Contrast
- Increase or decrease brightness to correct the exposure.
- Use the contrast slider to define the light and dark areas. Avoid overdoing it to maintain
natural-looking footage.
Enhance Colors with Saturation
Boost the saturation to make colors more vibrant, or reduce it for a desaturated, cinematic look.
Use Color Wheels
- Adjust the shadows, midtones, and highlights separately to fine-tune the colors.
- For example, you can add warmth to the highlights while keeping the shadows cool for a
balanced look.
Apply LUTs (Optional)
If your editor supports LUTs, try applying them to your footage. Experiment with different LUTs to
find one that matches your desired aesthetic.
Refine with Curves
Use RGB curves for precise control over color grading. Drag points on the curve to adjust
brightness and color levels for specific tonal ranges.
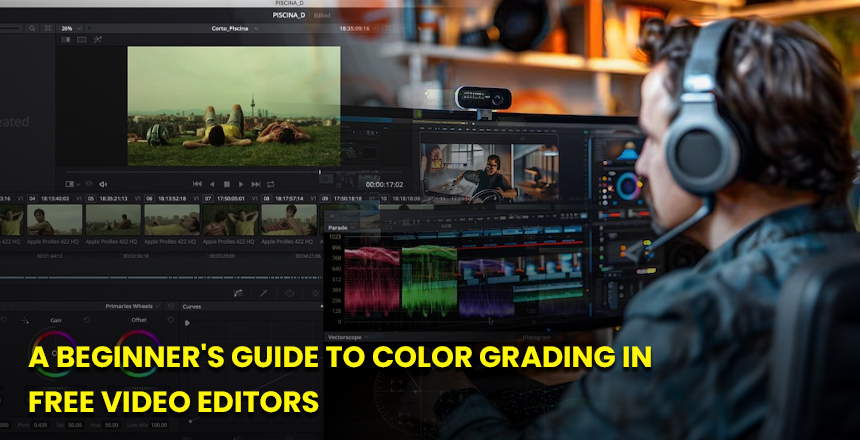
Check Your Work
Play back your footage to ensure the grading looks consistent across all clips. Use scopes (if
available) to analyze color and exposure levels for accuracy.
Export Your Video
Once satisfied, export your video in the desired format and resolution.
Tips for Successful Color Grading
Work with Good Footage
Color grading can only do so much. Start with well-lit and properly exposed footage for the best
results.
Be Subtle
Avoid overgrading your footage. Keep the adjustments natural and aligned with your video’s
theme.
Use Reference Images
If you’re aiming for a specific look, use reference images or videos as a guide.
Experiment
Don’t be afraid to try different techniques and tools. Color grading is as much an art as it is a
science.
Conclusion
Color grading is a skill that can dramatically enhance the quality and impact of your videos. With
free video editor like DaVinci Resolve, Shotcut, and VSDC, you have access to powerful tools
without spending a dime. By understanding the basics and practicing consistently, you’ll be able
to create visually stunning content that captivates your audience.
Now that you have a foundation in color grading, it’s time to dive in and start experimenting.
Happy editing!

Take a look at how IFDA helps you to have a great career by delivering the best content and practice.